Table of Contents
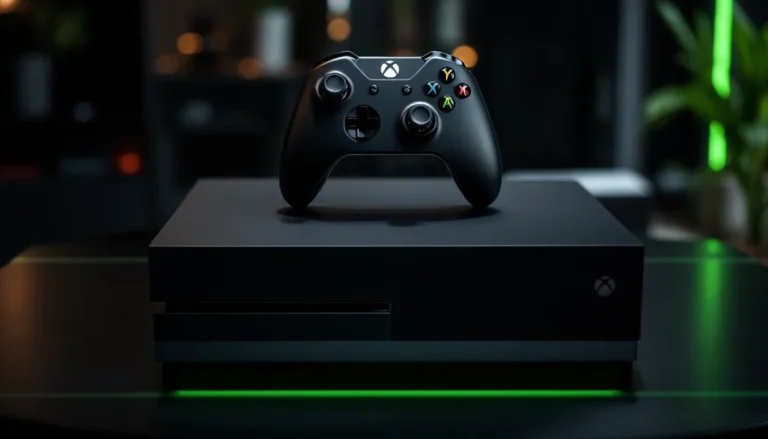
ToggleYour Xbox One gaming experience lives and dies by what’s coming through your headset. Whether you’re spotting footsteps in a competitive shooter, immersing yourself in a story-driven narrative, or coordinating with squad mates, audio quality isn’t optional, it’s foundational. The right wireless headset transforms how you perceive the game world, giving you the edge in fast-paced matches and deepening the emotional pull of every cutscene. But finding the perfect Xbox One wireless headset among dozens of options is its own challenge. This guide cuts through the noise (literally) to help you understand what separates a mediocre headset from one that genuinely improves your gameplay and comfort. We’ll walk through the key factors that matter, review standout models across different budgets, and show you exactly how to set up and maintain your new gear so it lasts.
Key Takeaways
- An Xbox One wireless headset should prioritize sound quality with frequency response around 20Hz–20kHz, clean mids for dialogue, and support for spatial audio like Dolby Atmos or Windows Sonic for competitive advantage.
- Comfort matters for extended sessions—aim for headsets under 300 grams with breathable memory foam ear cups and reinforced hinges to ensure durability over 2–3 years of regular use.
- Choose your connectivity method wisely: USB dongles offer the most stable connection for gaming, Xbox Wireless provides seamless integration, while Bluetooth introduces latency better suited for casual play.
- Premium options like the SteelSeries Arctis Nova Pro and budget-friendly picks like the HyperX Cloud Stinger 2 deliver excellent value, but your choice should match your gaming style and session length.
- Optimize your Xbox One wireless headset’s performance by enabling Dolby Atmos in audio settings, testing game-specific audio presets, and performing regular maintenance like cleaning ear cups and checking for firmware updates.
- Competitive gamers must prioritize low-latency connections and precise positional audio clarity, while casual players can focus on comfort and immersive sound quality without sacrificing core gaming performance.
What Makes A Great Xbox One Wireless Headset
Sound Quality and Audio Performance
When gamers talk about headset quality, they’re usually thinking about two things: frequency response and positional audio clarity. A decent Xbox One wireless headset should deliver clean mids (where dialogue and effects live), punchy lows (explosions, bass-heavy soundtracks), and crisp highs (UI sounds, distant threats) without distortion at higher volumes. Look for headsets that list frequency range around 20Hz to 20kHz, that covers the full spectrum of human hearing.
Positional audio is where things get interesting. Surround sound processing helps you pinpoint enemy locations by sound. Windows Sonic and Dolby Atmos are the two main spatial audio techs on Xbox. Dolby Atmos is generally the stronger choice if your headset supports it, though Windows Sonic is solid and free to all Xbox users. The difference matters most in competitive shooters where audio cues literally determine who lives and dies.
Driver size matters too. Larger drivers (50mm+) generally push more air and produce fuller sound, but what counts is implementation. A 40mm driver tuned correctly will beat a 50mm driver with muddy audio. When reviewing headsets, pay attention to user reports about how they actually sound in-game, not just marketing specs.
Comfort and Build Quality for Extended Gaming Sessions
You might have the world’s best-sounding headset, but if it’s killing your ears after two hours, you won’t use it. Gaming headset comfort is personal, some people hate memory foam ear cups, others can’t game without them. That said, a few principles apply universally: weight distribution, breathability, and adjustability.
Headsets under 300 grams tend to feel lighter during long sessions, though anything under 400g is reasonable. Ear cup material matters significantly. Leatherette (synthetic leather) looks sleek but traps heat: memory foam offers more comfort but can degrade: cloth or mesh breathes best but shows dirt. The sweet spot for most gamers is memory foam with breathable synthetic leather or cloth covering.
Build quality determines how long your investment lasts. Check for reinforced hinges, quality cable connections (if applicable), and durability ratings from retailers or reviewer testing. Some headsets use detachable cables, convenient for repairs but a potential failure point. Wireless-only headsets avoid that issue entirely but limit your options if the battery dies.
Compatibility and Connectivity Options
Xbox One wireless headsets connect via three main methods: 2.4GHz USB dongle, Xbox Wireless, or standard Bluetooth. USB dongles are typically the most stable and lag-free for gaming, though they take up a USB port. Xbox Wireless connects directly through Microsoft’s proprietary protocol and works seamlessly with all Xbox devices. Bluetooth is universal but sometimes introduces slight latency in games, fine for casual play, risky for competitive.
Cross-platform compatibility varies. Some headsets work on PC, Xbox One, and other systems: others are locked to Xbox. If you game across multiple devices, check the specs carefully. The good news: most modern gaming headsets support at least Xbox One and PC Windows 10/11.
Battery type influences reliability and longevity. Rechargeable lithium batteries are standard, but their lifespan degrades over time. Check if a headset offers user-replaceable batteries or if you’re stuck with degraded performance after 2–3 years. Wireless range typically sits between 30–50 feet indoors for quality gaming headsets, plenty for living room setups but worth confirming if you plan to move around.
Top Xbox One Wireless Headsets You Should Consider
Premium Gaming Headsets with Superior Sound
The SteelSeries Arctis Nova Pro stands out as the flagship choice for players who want industry-leading audio. It delivers exceptional soundstage, Dolby Atmos support, and a customizable EQ that lets you dial in sound for specific games. The build quality is professional-grade, reinforced hinges, detachable cables, and swappable batteries. Battery life hits 40 hours, easily the best in class. The catch? Price lands around $349, making it an investment. For competitive FPS play, this headset’s positional audio clarity is hard to beat.
The Turtle Beach Stealth 700 Gen 2 MAX offers a more balanced premium experience. It features Dolby Atmos, 40+ hour battery, and solid build quality at a lower price point (around $199–$249). The sound profile emphasizes game audio without unnecessary bass boost, making it versatile across genres. The fit is comfortable for extended sessions, though the ear cups aren’t memory foam.
For console purists, the Xbox Wireless Headset (Microsoft’s official offering) deserves serious consideration. It’s designed specifically for Xbox One and Series X
|
S, integrating seamlessly with the ecosystem. At roughly $119, it undercuts competitors while delivering clean audio, good spatial processing via Windows Sonic, and 15-hour battery life. It won’t match high-end options sonically, but the value proposition is strong. The Xbox One Archives has detailed comparisons if you’re weighing multiple options.
Budget-Friendly Options Without Sacrificing Quality
If your budget sits under $100, the HyperX Cloud Stinger 2 remains the gold standard. It weighs just 190 grams, has a noise-canceling microphone, and delivers surprisingly clean audio with a mild bass emphasis gamers often appreciate. Battery life is solid at 20 hours. Build quality is respectable for the price. The main trade-off: less precise positional audio than premium models, but still adequate for most gaming situations.
The PDP LVL50 Wireless is a more recent contender in the budget space, offering decent sound quality, comfortable ear cups, and 15-hour battery at around $70–$90. It’s Microsoft-licensed and optimized for Xbox, supporting Windows Sonic surround. Not bleeding-edge, but genuinely solid for casual gaming and streaming.
If you’re coming from no headset at all, even a $60 budget option will dramatically improve your game experience compared to TV speakers. The principle: pick the best build quality you can afford. A $100 headset with metal hinges will outlast a $150 headset with plastic construction.
Headsets Optimized for Competitive Gaming
Competitive gamers prioritize clarity and responsiveness over flashy features. The SCUF Ops3 Wireless is designed explicitly for esports. It features Dolby Atmos, noise-canceling mic, and lightweight design (280g). Audio is tuned for hearing enemy footsteps and callouts clearly. It’s available at roughly $179. Players report the positional accuracy in games like Call of Duty and Valorant is exceptional.
The SteelSeries Arctis Nova 1 (the non-Pro version) strips down some features while maintaining the sound signature competitive players need. Priced around $159, it keeps the Arctis strength: accurate soundstage and clean audio without colored EQ pushing certain frequencies unnaturally. For ranked matches where audio cues matter, this is a class leader.
If you’re serious about ranked FPS play, prioritize headsets with latency-free connections (USB dongle or Xbox Wireless preferred over Bluetooth) and headsets that support your game’s native surround sound implementation. Test any headset’s compatibility with the specific titles you main before committing, as some headset-game combinations perform better than others. Technical sites like RTINGS reviews provide detailed frequency response graphs and latency testing if you want deep specs.
How to Choose the Right Headset for Your Gaming Needs
Assessing Your Gaming Style and Genre Preferences
Your favorite game genres directly influence which headset features matter most. Competitive shooter players need precise positional audio and minimal latency, they’re betting their rank on audio cues. Story-driven single-player gamers prioritize soundstage and emotional impact over precision. Multiplayer RPG players value both good sound quality and reliable voice chat clarity.
List your top 5–10 games you play regularly. Look at whether they support Dolby Atmos natively (many modern AAA titles do). Check if you play competitive ranked modes (which demand low-latency audio) or casual matchmaking. The more time you spend in competitive multiplayer, the more headset investment pays off in actual performance gains.
Consider your typical gaming session length. If you average 1–2 hours per session, comfort becomes less critical. If you’re a 4–6 hour weekend warrior, memory foam ear cups and lightweight construction become non-negotiable. Budget gamers who play casually can prioritize pure sound quality over comfort features.
Battery Life and Wireless Range Considerations
Battery specifications matter differently depending on your setup. If your console stays in one room and you game regularly, aim for at least 15–20 hours per charge. This means you won’t need to charge between sessions most nights. If you’re a casual gamer playing sporadically, even 12-hour batteries work fine.
Consider your charging setup. Some headsets charge via USB-C (fast, modern), others use micro-USB (slower, more universal), and some support wireless charging docks (convenient but expensive). Fast-charging matters less for gaming headsets than, say, phones, you’re not charging mid-session often. But a 2-hour recharge is way better than 6 hours if you forget overnight.
Wireless range rarely matters for home gaming, but test it anyway. Walk around your room, your home, even to another room while in a party chat. If your headset cuts out 15 feet from your console, that’s a problem. Most quality gaming headsets handle 30+ feet indoors reliably. Read user reviews specifically mentioning range before buying, some cheaper models have notorious connection drops.
Battery degradation is real. Lithium batteries lose capacity over time, typically losing 20% of capacity after 2–3 years of regular use. Check if your headset has user-replaceable batteries (increasing longevity) or if you’re stuck with declining battery health. Premium brands usually last longer in this regard.
Microphone Quality for Multiplayer and Voice Chat
If you play multiplayer at all, the microphone is just as important as the speakers. A great headset with a terrible mic makes you the guy everyone else mutes. Look for these features: noise cancellation (reduces background fan noise, keyboard clacking), detachable design (easier cleaning), and flexible boom arm (positioning matters for clarity).
Microphone polar pattern affects who hears your voice. Cardioid mics pick up primarily what’s in front, you, while rejecting side and rear noise. Omnidirectional mics pick up 360 degrees, picking up everything in your room. For gaming, cardioid is standard and better. Confirm this in specs before buying.
Test the mic setup if possible. Some headsets have non-removable booms permanently positioned near your mouth: others have fully adjustable designs. If the mic sits too far or too close, your teammates will complain. Flip through YouTube videos of headset reviews for actual audio samples, you’ll hear if the mic quality is compressed or natural.
Noise-canceling mics need dual microphones (one cancels, one records) and software processing. Not all “noise-canceling” mics are equal. High-quality implementation is mainly found in $150+ headsets. Budget options offer basic mic quality without fancy cancellation. If your room has constant background noise (fans, roommates, pets), investing in a headset with proven noise-canceling is worth it.
Setting Up and Optimizing Your Xbox One Wireless Headset
Initial Pairing and Connection Process
Most Xbox One wireless headsets pair in one of two ways. USB Dongle headsets: Plug the wireless adapter into any available USB port on your console (front or back), power on the headset, and they should auto-detect within 30 seconds. If not, check for a pairing button (usually on the dongle or headset) and press it for 3–5 seconds until a light flashes or stabilizes.
Xbox Wireless headsets (Microsoft-made or officially licensed): Power on the headset, then navigate to Settings > Devices & connections > Accessories on your Xbox One. Select Add an accessory and follow the on-screen prompts. The system will search for compatible devices and establish connection automatically.
Bluetooth headsets: Go to Settings > Devices & connections > Bluetooth, set your headset to pairing mode, and select it from the available devices list. Note that Bluetooth audio latency on Xbox One is typically higher than USB or Xbox Wireless, acceptable for single-player games but risky for competitive multiplayer.
Once connected, don’t assume the headset is optimized. Check that your console recognizes the headset under Connected accessories. Test audio by launching a game, you should hear sound coming from the headset, not the TV. If you hear both, adjust TV output settings: Settings > Display & sound > Audio output > Headset format and select your headset instead of HDMI. Some users experience issues here, so verify the setting explicitly.
Adjusting Audio Settings for Optimal Performance
After physical setup, jump into Xbox audio settings for real optimization. Navigate to Settings > Display & sound > Audio output and explore these options:
Headset format determines how the console sends audio to your headset. For headsets supporting Dolby Atmos, select Dolby Atmos here. If your headset only supports stereo, keep it on Stereo uncompressed. Windows Sonic is available by default and works with most headsets, it’s a solid middle ground if Dolby isn’t available.
Headset volume controls the overall audio level independent of TV volume. Set this to a comfortable listening level. Many gamers prefer 60–75% to avoid fatigue during long sessions and maintain hearing safety.
Volume mix is often overlooked but crucial. This setting controls the balance between game audio and party chat. Aim for a 70/30 or 80/20 split favoring game audio so you hear footsteps but teammates’ callouts remain audible. Adjust based on your specific game and squad.
In the game settings for competitive titles, look for audio presets tuned to your headset type. Call of Duty, Valorant, and Fortnite all offer audio profiles optimized for different headset styles. Some emphasize footstep clarity: others balance all elements. Test a couple matches with different presets to find what works for your hearing.
If your headset has custom EQ software (available through manufacturer apps or official companion apps), use it. Don’t max everything out. Instead, make small adjustments: if you’re missing footsteps in competitive games, boost mids and highs slightly. If explosions feel thin, add bass. Changes of 2–3dB are better than aggressive 10dB boosts that distort and fatigue.
Troubleshooting Common Connectivity Issues
Connection drops are the most common complaint. If your headset keeps disconnecting:
First step: Power cycle everything. Turn off your headset, the wireless adapter (if applicable), and your Xbox One completely. Wait 30 seconds. Power on in reverse order: Xbox first, then headset, then adapter if separate. This resolves 80% of connection issues.
Interference: Wireless headsets operate on 2.4GHz, the same frequency as WiFi routers, microwaves, and baby monitors. If your wireless range suddenly drops or becomes unreliable, move your router further from your gaming space or position the wireless adapter away from other devices. Walls and obstructions kill signal: ensure direct line-of-sight where possible.
Firmware updates: Check the manufacturer’s app or website for headset firmware updates. Outdated firmware sometimes causes connectivity stutters. Updates are painless, just connect via USB, run the update, and restart.
Low battery: Connection stability degrades as batteries drain. If you notice frequent drops or audio cutting out, charge your headset fully and see if the problem resolves. If it does, your battery might be failing and needs replacement or repair.
USB port issues: If using a USB dongle, try a different USB port on your console. Sometimes ports malfunction or provide insufficient power. Front ports are typically more stable than back ports on Xbox One S and X models.
If none of these work, test the headset on another device (PC, another Xbox, mobile) to confirm it’s not a device-specific compatibility issue. Check if a recent Xbox system update is pending, sometimes consoles get updates that temporarily break accessory compatibility until your headset firmware catches up. If the headset fails across multiple devices, contact manufacturer support with your model number and serial information.
Maintenance Tips to Extend Your Headset’s Lifespan
Care and Cleaning Best Practices
Your headset accumulates ear oils, dust, and dead skin cells, less appetizing the longer you don’t think about it, but cleanable. For cloth ear cup covers, brush gently with a soft-bristled brush or lint roller every week or two. For leather or leatherette, wipe down with a slightly damp microfiber cloth, avoid soaking. For stubborn buildup, use a 50/50 water and mild dish soap solution on the cloth, then dry immediately with a separate cloth.
The headband and boom arm collect sweat and dust. Wipe these weekly with a microfiber cloth. For the boom mic itself, avoid liquid, instead, use a slightly damp cloth to gently clean the surface, never the microphone opening. Keep the mic grille clear: dust blocking the grille reduces voice clarity.
For ear cup removability, check if your headset has detachable ear cups. Many premium models do, this is a huge maintenance advantage. Detachable cups can be washed separately (check manufacturer instructions for water temperatures and drying). If they’re not detachable, you’re limited to surface wiping.
Store your headset in a dry environment away from direct sunlight. UV exposure degrades plastic and can fade leather. If you’re storing long-term, keep batteries charged to 50% (not full, not empty) to minimize battery degradation. Some gamers use headset stands or wall mounts to avoid the heaphones rolling around and sustaining damage.
Storage and Firmware Updates
When not in use, hang your headset on a stand or hook rather than leaving it on the desk where it could get crushed, snagged, or exposed to liquid spills. The boom arm and hinges are flex points, repeated bending can cause failures. Store with the boom arm retracted or adjusted inward to reduce stress.
If storing for weeks or months, charge the battery to about 50% and power the headset completely off. This preserves battery chemistry and prevents potential leaks. Keep in a cool, dry place, not near heat sources, windows, or bathrooms where moisture is high.
Firmware updates are critical. Manufacturers regularly release updates fixing connection bugs, improving audio processing, and sometimes adding features. Check the manufacturer’s website or app monthly for updates. Most updates download automatically if your headset is connected via USB, but manual updates are also available. Update process is straightforward: connect via USB, launch the update utility, and follow prompts. It takes 5–10 minutes.
Why bother? Beyond bug fixes, firmware updates sometimes optimize audio profiles for newer games or consoles. Missing an update could mean missed compatibility improvements when a major new game launches. If you’re experiencing connection issues or audio quirks, check for pending updates before troubleshooting further, many issues vanish post-update.
For headsets with detachable or replaceable batteries, have a spare battery on hand if available. Some premium models support this. A worn-out battery (12-hour life instead of original 30+ hours) is frustrating but fixable if you can swap it yourself. If battery replacement requires opening the headset or sending it in, you’re looking at weeks without your primary audio gear. Plan accordingly.
Conclusion
Finding the right Xbox One wireless headset isn’t about chasing the most expensive option or the one with the most features. It’s about matching the headset’s strengths to how you actually game. A competitive player needs low latency, precise positional audio, and excellent build quality. A casual story-game enjoyer might prioritize comfort and immersive sound quality over features they’ll never use.
You’ve now got the framework: understand the core factors (sound, comfort, compatibility), know what’s available at different price points, and recognize how to optimize and maintain your gear once you buy. The Astro A40 Xbox One remains a powerhouse choice if you want a no-compromises headset. For budget-conscious players, options like the HyperX Cloud Stinger 2 or Microsoft’s own Xbox Wireless Headset deliver solid value without forcing major sacrifices.
Whatever direction you go, test the headset in your specific games if possible before committing. Audio perception is personal, what works perfectly for someone else might feel wrong in your ears. Read user reviews on tech sites like PCMag and TechRadar, watch YouTube footage of actual gameplay audio, and consider return policies from retailers in case the headset doesn’t mesh with your preferences.
Your gaming improved the moment you decided audio matters. With the right wireless headset on your head, you’re not just hearing the game, you’re feeling it. Footsteps become warnings, explosions become immersion, dialogue becomes connection. That’s the difference between a good gaming session and one that sticks with you.